
If you searched for always on top Mac, macOS always on top, or keep window on top Mac, the short answer is simple: macOS does not include a native always-on-top toggle for normal app windows.
That means a Notes window, PDF, browser tab, Zoom call, ChatGPT window, or terminal pane will usually disappear as soon as you click another app. To keep a window visible, you need one of three practical routes: a dedicated always-on-top app, a broader Mac window manager, or Picture-in-Picture for video.
Quick Answer
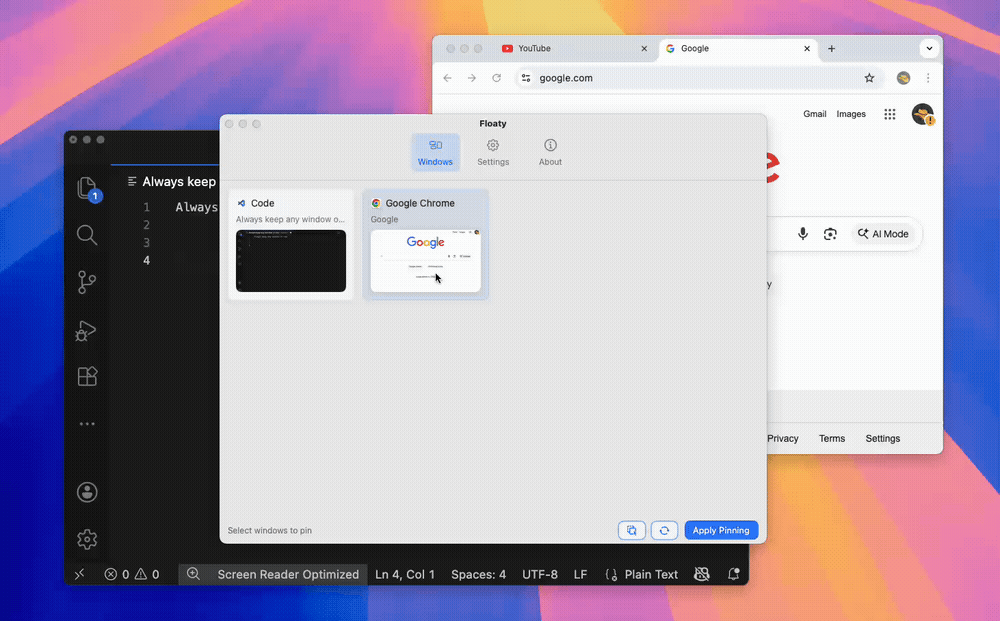
For most people, the easiest way to keep any Mac window always on top is to use a dedicated pinning tool like Floaty.
- Open the app window you want to keep visible.
- Open Floaty from the menu bar.
- Choose the window and apply pinning.
- Keep working in another app while the pinned window stays above it.
Download Floaty for Mac if you want the direct always-on-top workflow, or keep reading for the full comparison.
Can macOS Keep a Window Always on Top?
Not by itself.
macOS has Split View, Stage Manager, Mission Control, Spaces, and Picture-in-Picture, but it still does not have a general “keep this window on top” command. Apple controls window layering tightly, and normal apps cannot make themselves permanently float above every other app without help from a utility.
That is why the same searches keep coming up:
always on top macmacos always on topmac keep window on topmac window always on tophow to make a window stay on top macpin window on top mac
The intent behind all of them is the same: you want one reference window to stay visible while your main work happens somewhere else.
Best Ways to Keep a Window on Top on Mac
There are three realistic options.
| Method | Best for | Works with normal app windows? | Main trade-off |
|---|---|---|---|
| Floaty | Keeping any specific window visible with minimal setup | Yes | Requires macOS permissions |
| Rectangle Pro | People already using a window manager | Yes, via an always-on-top feature | Pinning is one feature inside a larger tool |
| BetterTouchTool | Advanced Mac automation and gestures | Yes, depending on setup | Powerful, but more configuration-heavy |
| Moom / Magnet | Window layout and snapping | Mostly layout-focused | Not primarily built for always-on-top workflows |
| Picture-in-Picture | Floating videos | Video only | Does not pin the full browser or app window |
| Legacy Afloat-style hacks | Old macOS setups | Unreliable on modern macOS | Often broken by SIP, notarization, and updates |
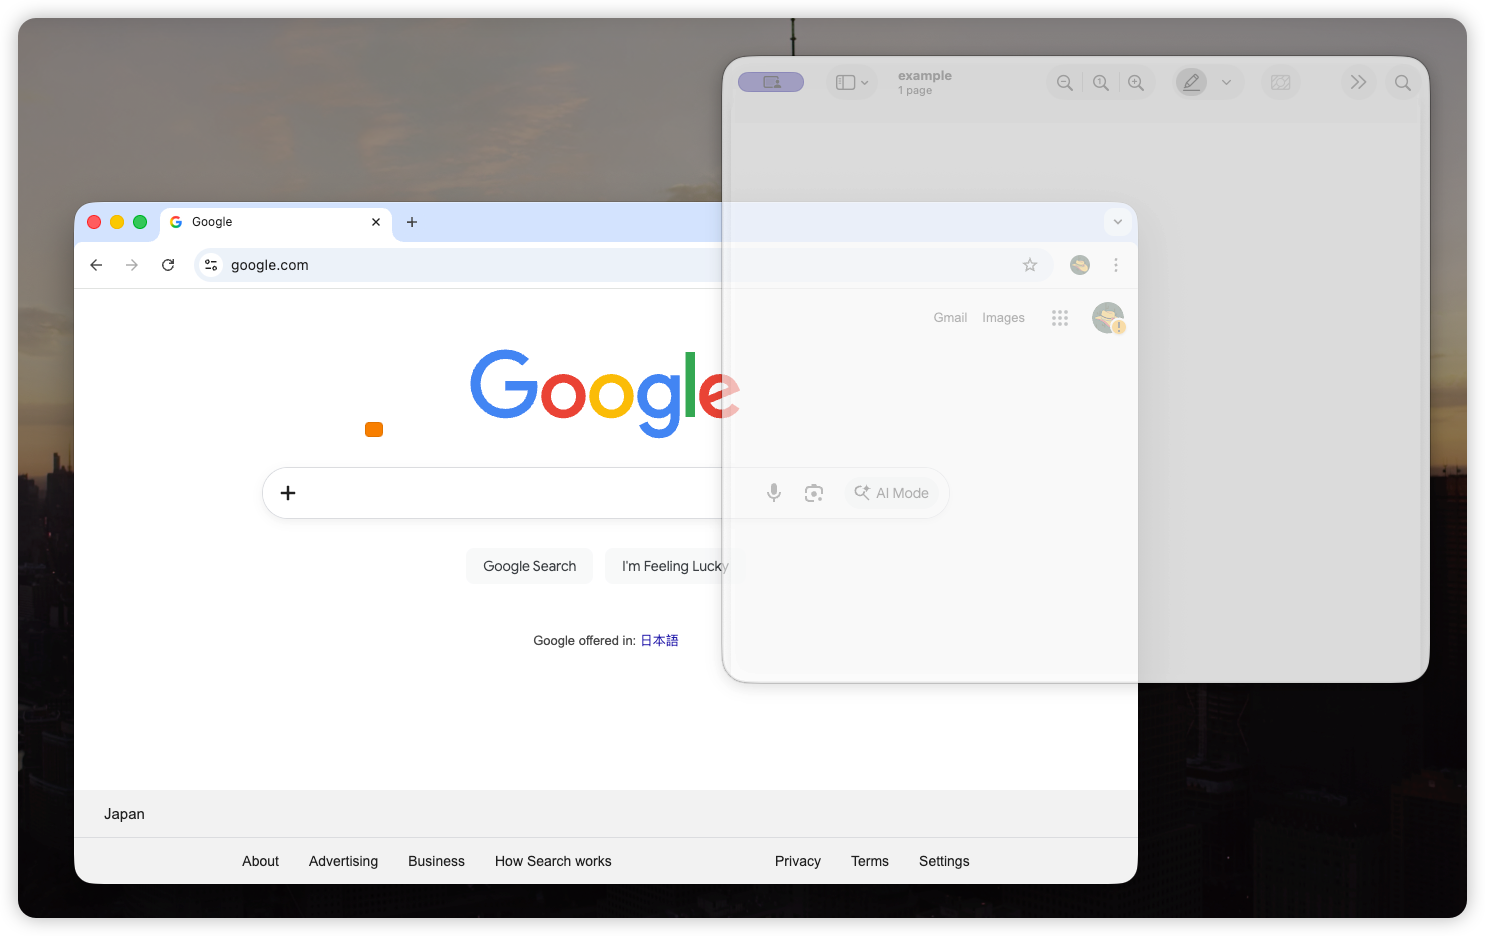
Option 1: Use Floaty for a Dedicated Always-on-Top Workflow
Floaty is built around one job: keep the window you choose visible while you work somewhere else.
That makes it a good fit when you want to:
- Keep ChatGPT or Claude visible while coding
- Keep a PDF visible while writing
- Keep Notes visible during a Zoom call
- Keep documentation visible next to Xcode, VS Code, or Terminal
- Keep a browser reference window above a design or writing app
- Keep a YouTube tutorial visible without losing the full page
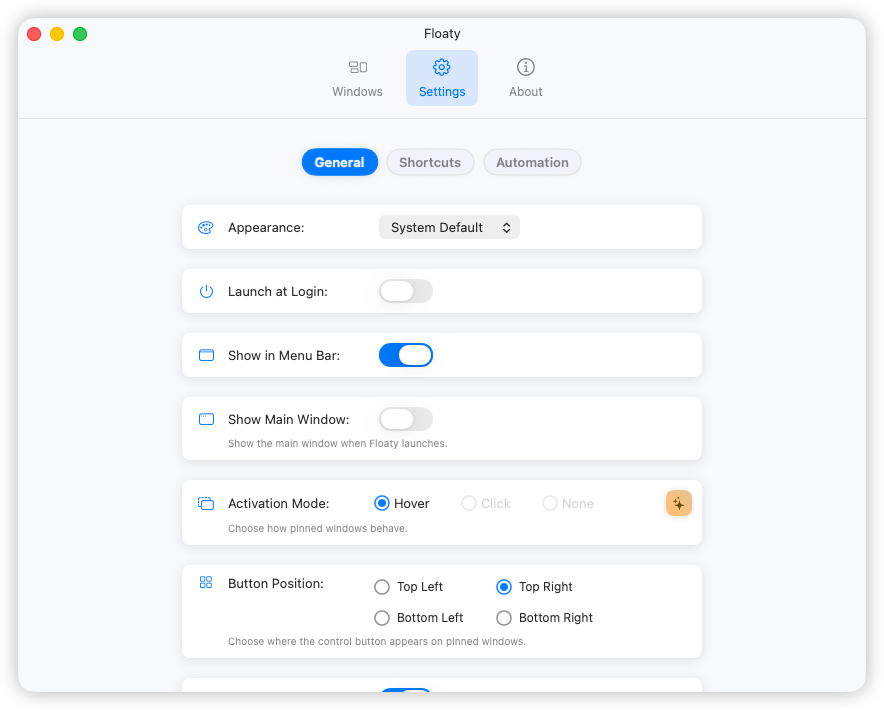
Floaty also includes controls that matter specifically for pinned windows: opacity, click-through, multiple pinned windows, and a menu bar window list.

Option 2: Use Rectangle Pro or Another Mac Window Manager
If you already use Rectangle Pro, BetterTouchTool, Moom, or Magnet, you may prefer to keep your window workflow inside one tool.
This is strongest when you care about layout first:
- snapping windows into halves or thirds
- assigning keyboard shortcuts
- moving windows between displays
- resizing windows into repeatable positions
The trade-off is that always-on-top behavior is usually secondary. You may not get the same per-window controls, opacity options, click-through behavior, or visible pinned-window management that a dedicated tool provides.
If your shortlist is specifically Rectangle Pro and Floaty, read the focused Rectangle Pro vs Floaty comparison.
If you are deciding between a snapping app and a dedicated pinning app, the Magnet vs Floaty comparison explains when layout is enough and when always-on-top behavior matters.
If you are comparing automation tools instead, the BetterTouchTool vs Floaty guide explains when a broad trigger-based app makes sense and when a dedicated pinning tool is simpler.
Option 3: Use Picture-in-Picture for Video
Picture-in-Picture is the simplest built-in option when the thing you want to keep visible is a video.
It works well for:
- YouTube videos
- lectures
- tutorials
- webinars
- video reference material
But PiP is not the same as keeping a window always on top. It floats the video player, not the full browser window. You lose the page, comments, transcript, sidebar, notes, and controls around the video.
For a full workflow, see the guide to watching YouTube while working on Mac.
Which Always-on-Top Method Should You Choose?
If you only need floating video, use Picture-in-Picture.
If you already use a full Mac window manager and enjoy configuring shortcuts, Rectangle Pro or BetterTouchTool can make sense.
If your main goal is simply to keep one or more normal app windows visible, Floaty is the more direct choice. It does not try to replace your whole window manager. It gives you a clear way to pin the windows that matter and then get back to work.
Real Workflows Where Always on Top Helps
Always-on-top is useful because it reduces context switching. The best use cases are task-based, not app-based.
Keep ChatGPT Visible While Coding
Pin ChatGPT or Claude beside VS Code, Xcode, Terminal, or your browser docs. This lets you compare suggestions, paste snippets, and keep the assistant in view without switching Spaces every few minutes.
Read the dedicated ChatGPT and Claude always-on-top guide.
Keep a PDF Visible While Writing
Pin a research paper, spec, contract, or brief above your writing app. This is especially useful when you need to cite, compare, or rewrite from source material without constantly bringing Preview back to the front.
Read the PDF and Preview always-on-top guide.
Keep Notes Visible During Zoom Meetings
Pin Apple Notes, Notion, or a meeting agenda above Zoom, Google Meet, or your browser. You can keep talking points visible while still typing in another app.
Read the Notes always-on-top guide.
Keep Documentation Visible While Programming
Pin Safari, Chrome, Preview, or a documentation page while your editor stays active. This is useful on a single monitor, where side-by-side layouts often make both windows too narrow.
Read the Chrome and Safari always-on-top guide.
Why Old Afloat-Style Tools Are Risky Now
Older Afloat and SIMBL-style tools were common recommendations years ago. On modern macOS, they are usually not worth the trouble.
System Integrity Protection, notarization, Apple Silicon changes, and stricter permission models make many legacy hacks fragile. Some fail silently, some require disabling protections, and some break after macOS updates.
If you found an old forum thread recommending Afloat, start with the Afloat alternative for modern macOS instead.
FAQ
Does Mac have an always-on-top feature?
No. macOS does not include a built-in always-on-top toggle for normal app windows. You need a utility like Floaty, a window manager feature, or Picture-in-Picture for video-only use.
How do I keep a window on top on Mac?
Open the window you want to keep visible, select it in Floaty, and apply pinning. The window stays above other apps while you continue working.
Can I keep multiple windows always on top?
Yes. Floaty can pin multiple windows at the same time, which is useful for workflows like Zoom plus Notes, a PDF plus a writing app, or ChatGPT plus documentation.
Does Rectangle Pro have an always-on-top feature?
Rectangle Pro includes an always-on-top feature, but it is part of a broader window management tool. It can be a good fit if you already use Rectangle Pro for snapping and shortcuts.
Is BetterTouchTool better than Floaty for always on top?
BetterTouchTool is better if you want advanced gestures, automation, and custom triggers. Floaty is better if your main job is simply to keep chosen windows visible with less setup.
Does always on top work with fullscreen apps?
Not reliably. Fullscreen apps live in separate macOS Spaces, which limits how overlays can behave. For the most predictable results, keep your main app in a normal window or use Split View instead of true fullscreen.
Are Screen Recording and Accessibility permissions safe?
Floaty uses Accessibility to select and manage windows, and Screen Recording to show window previews. The work happens locally on your Mac; Floaty does not transmit your screen content.
Keep Any Mac Window Visible with Floaty
Floaty is for the moments when one window should stay in view while the rest of your work keeps moving.
Related Guides
- Best Picture-in-Picture Alternatives for Mac
- How to Create a Floating Window on Mac
- How to Pin Any Window on Top on Mac
- Magnet vs Floaty: Window Snapping vs Always-On-Top on Mac
- BetterTouchTool vs Floaty: Always-On-Top Windows on Mac
- How to Keep Any Window Always on Top on macOS
- Pin Window on Mac: the macOS Always on Top playbook
- How to Keep PDF and Preview Always on Top on Mac
- How to Keep Notes Always on Top on Mac
- How to Keep Chrome or Safari Always on Top on Mac
- macOS Multitasking Workflow: Floating Windows That Actually Work